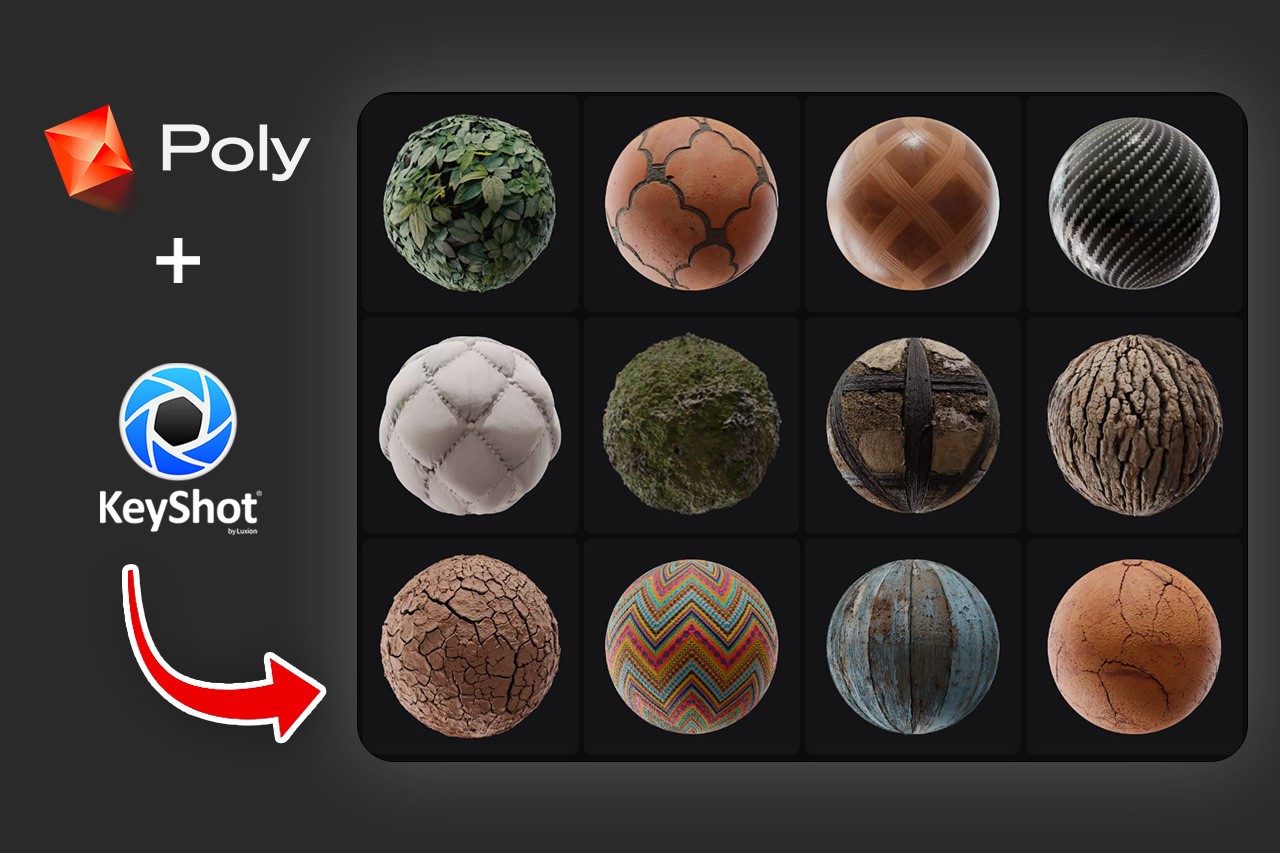
If there’s one secret I have to share with you to help you unlock the power of better renders, it is to make the materials and environment yourself. Using standard assets is great for quick work, but when you want quality, it’s important to look beyond what your rendering software provides. We covered how you can make your own environments in seconds using AI in an article last month, and now this piece will help you figure out how to make your own KeyShot materials from scratch… using Artificial Intelligence.
As wonderfully easy KeyShot’s material graph is for making parametric materials, if you want to make your own materials from scratch, you need to make sure you’ve got your own texture files. Once you do, KeyShot can work its magic, turning those textures into high-quality materials for your photoreal renders (88% of designers say KeyShot’s rapid workflow provides the best renders in the fastest time).
Free KeyShot 11 Trial: Download Now | Free KeyShot Report: Download Now
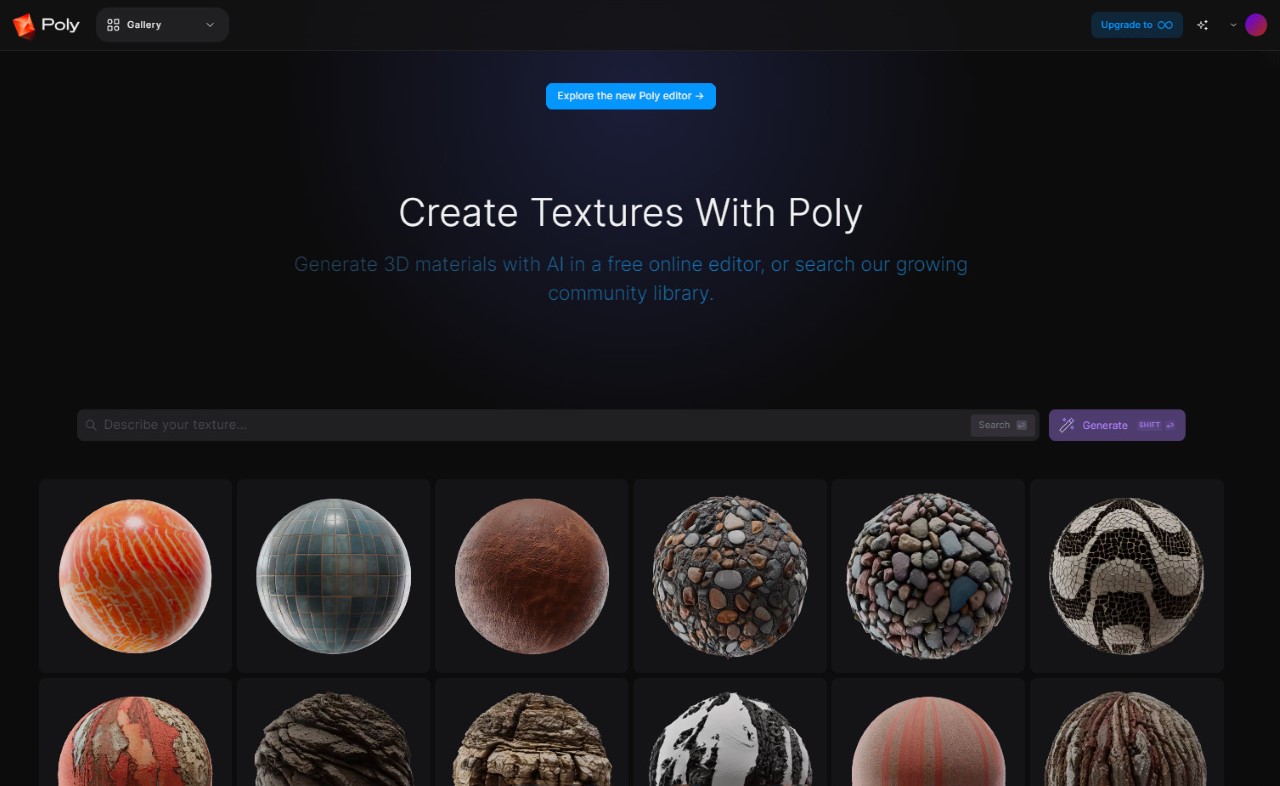
WithPoly AI Material Builder
Making your own materials can be a bit of a hassle, given that you need more than just a hi-res image. To make the material look realistic, you also need to make sure your image texture is seamless and is supplemented with other data, like reflectivity, roughness, bump/displacement, ambient occlusion, and a bunch of other factors that add literal depth and realism to your materials. One option is to scour the internet, buying seamless textures and materials from places like CGTrader or Gumroad, or using libraries like PolyHaven or KeyShot Cloud for free but limited resources… Another alternative, however, is to create your own assets using AI text-to-image or image-to-image tools, like WithPoly.
WithPoly is a freemium, easy-to-use website that lets you create your own KeyShot materials using either a text prompt or an image prompt. Using the power of AI, the service lets you either type to create materials from scratch, or upload images and turn them into materials with a few simple steps. The website will generate the texture, let you edit it, upscale it, make it seamless, and even generate color (albedo), roughness, normal, and displacement maps based on the material you create. Instead of spending hours browsing the internet or editing images to make them seamless and extract surface and depth information, WithPoly lets you create your own material assets in a matter of minutes, giving you exactly the kind of materials you need for your renders, whether it’s something as basic as cracked concrete, or as obscure as giraffe skin. Most of WithPoly’s core features are free, and you can download materials made by other people too from WithPoly’s extensive gallery. A $20 per month upgrade to its ‘Poly Infinity’ tier gives you access to a host of other features, including 32-bit exports, 8K resolution image generations, and a royalty-free commercial license to your materials, which you can then sell online.
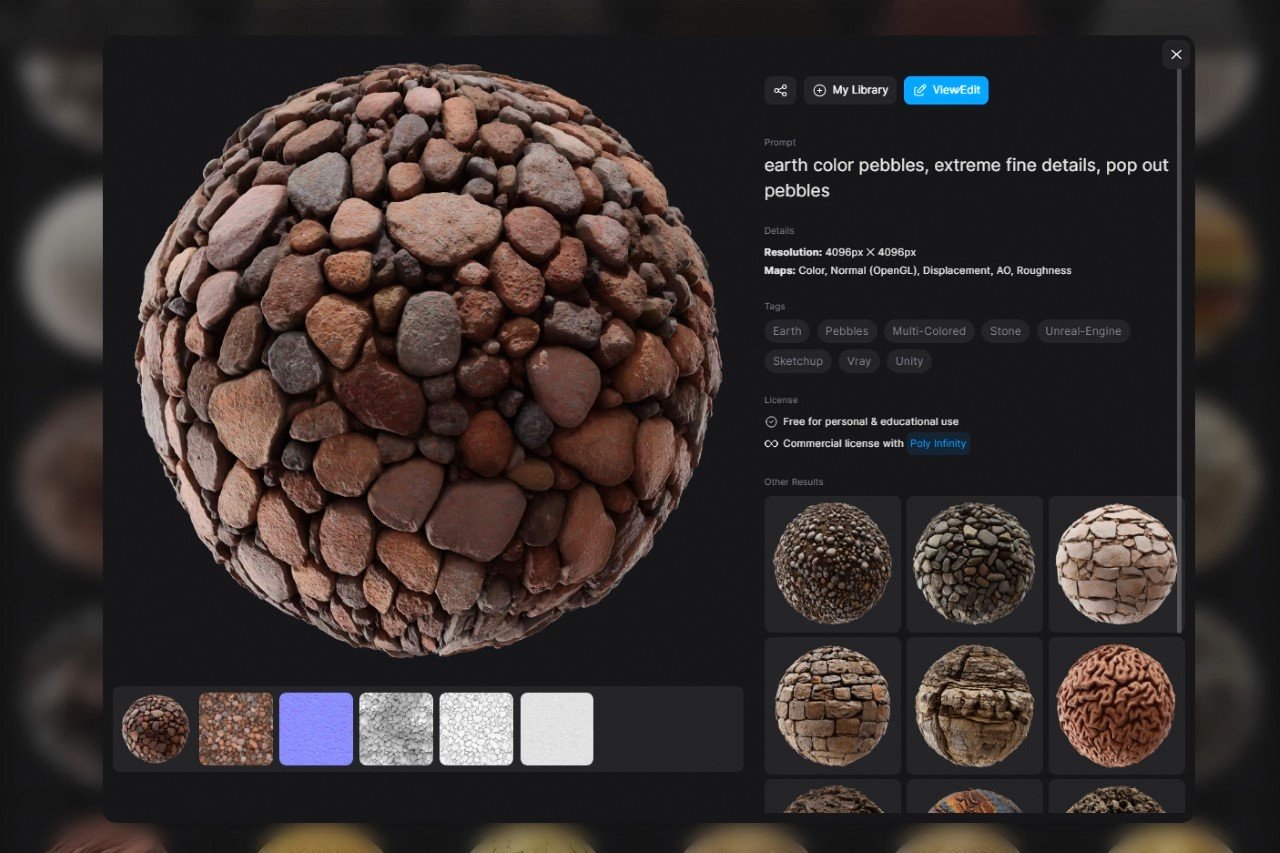
An example of an AI-generated material from the WithPoly gallery
Text-to-image Material Builder
Open up the WithPoly website and you’re greeted with a search box that lets you search its library for any textures that match your requirements. If you don’t find anything satisfactory, a Generate button right beside the search button turns your search query into a text prompt. Edit the prompt to make it as specific or vague as you want, choose from the various material types, and hit enter to make the AI generate 4 textures that closely match your requirements.
The AI doesn’t just create an image the way Midjourney or Stable Diffusion does, it’s built to create contextual images that perfectly match your needs. Not only does it create the color map file, but it also ensures it’s high res (up to 2K for free accounts), seamless, and tiled onto a sphere to preview. Alongside the color map (or Albedo in rendering terms), WithPoly also generates a normal map, roughness map, height map, ambient occlusion map, and a metalness (or fresnel) map. Once generated, you can either tweak them further or download the files as a ZIP package that you can then use in KeyShot.
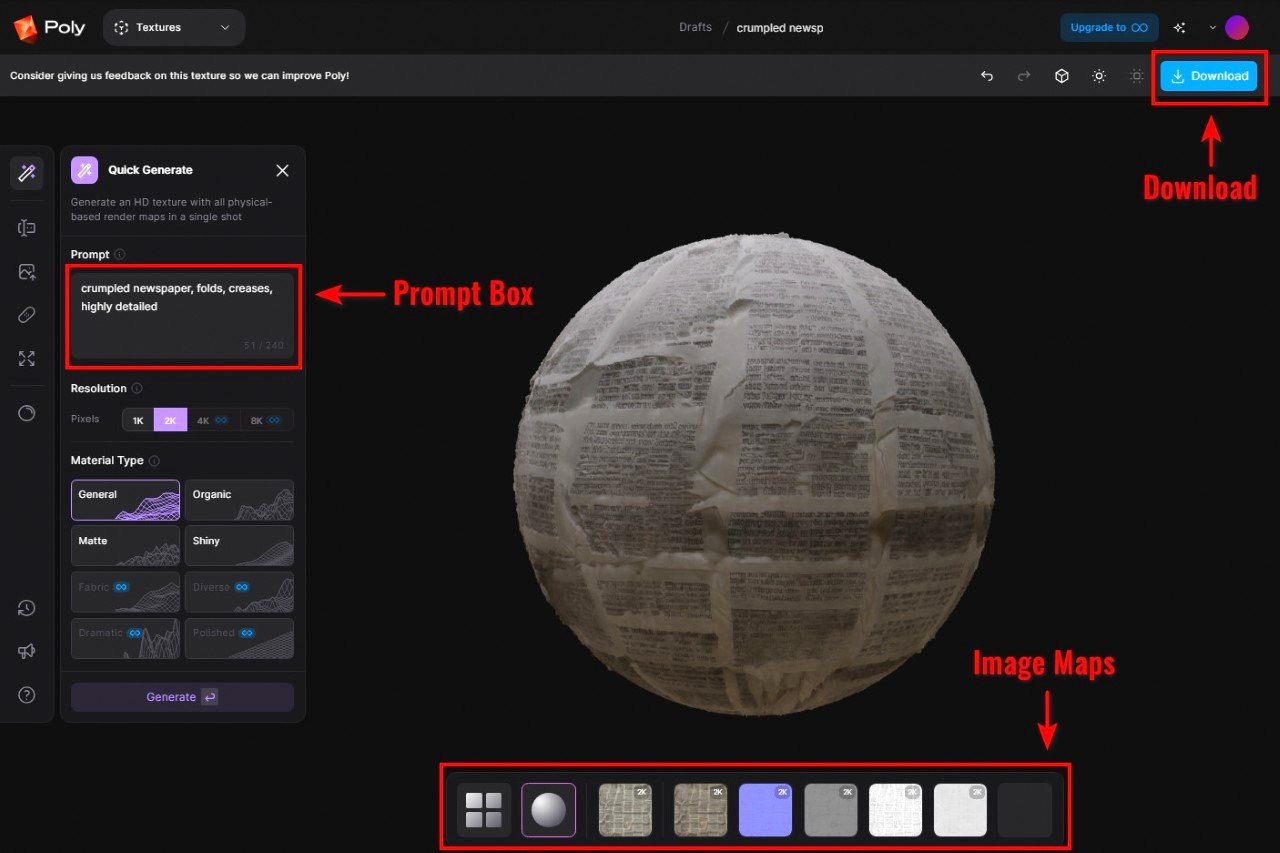
Creating a material using text on WithPoly
Image-to-image Material Builder
You don’t need to rely on just the AI-generated image for your ‘materialistic’ needs. WithPoly lets you upload your own image files and turn them into materials too. A “Make Patches” tool lets you upload an image of your choice and write a prompt, essentially guiding the AI to make ‘similar’ images… or the “Upload Image” feature lets you directly convert your image file into a material. Once you’ve uploaded your image, WithPoly’s AI lets you make it seamless, upscale it, and generate normal and height maps corresponding to your image. Roughness, AO, and Metalness maps aren’t accessible for the Upload Image feature to free accounts, but it’s still enough to work with. That being said, your Image-to-image materials will lack sufficient detail in order to make them realistic. To solve for this, it’s best if you simply download assets for materials created by other people in the WithPoly gallery, or go for the Paid tier to access all of WithPoly’s features.
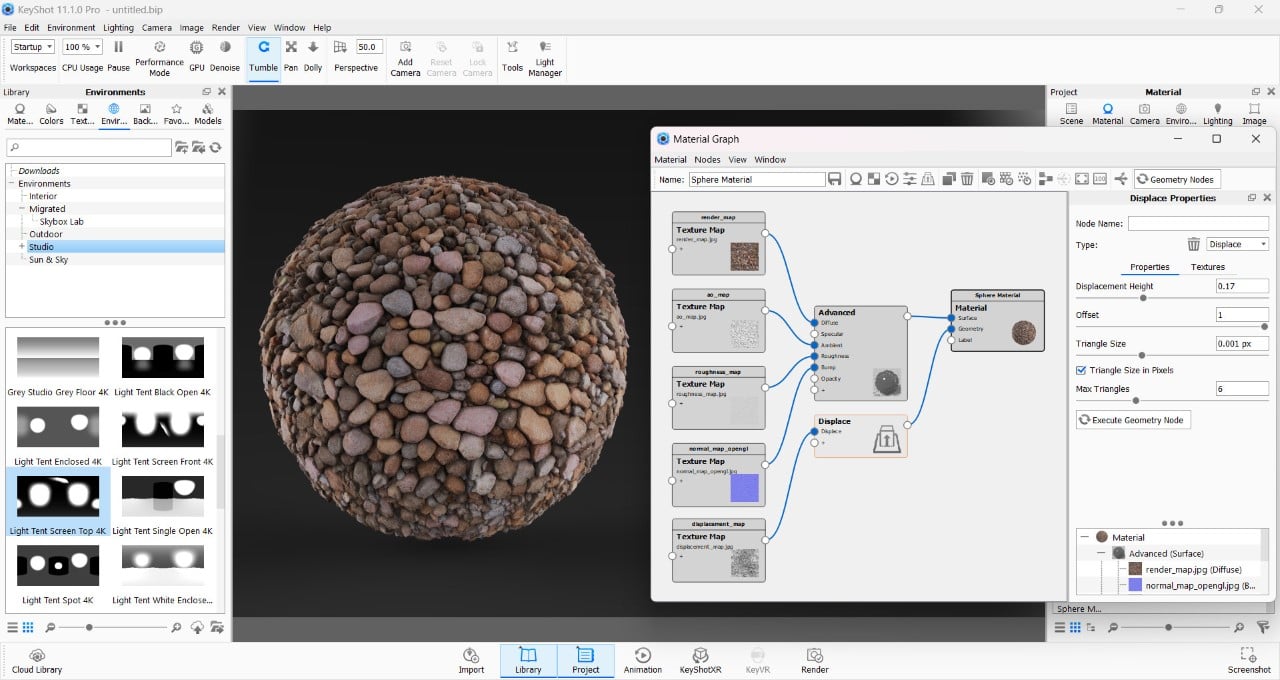
Using the KeyShot Material Graph to create your material in the rendering software.
Building your Material in KeyShot
KeyShot’s Material Graph makes it ridiculously easy to create your own materials from scratch. If you’re interested in learning more about how the Material Graph works, Will Gibbons has a wonderfully concise YouTube tutorial from a month ago. Build out your material by dragging the texture assets into the graph and plugging them into the right nodes. Color/Albedo goes into the Diffuse node, Roughness into the Roughness node, Normal into the Bump node, Height into a separate Displacement node within the Geometry drop-down menu. There’s no node for Metalness or Fresnel, but plugging the Metalness texture into Specular can sometimes give you the reflectivity you’re looking for. Don’t forget to properly adjust the texture scale and positioning, and to name and save your material when you’re done!
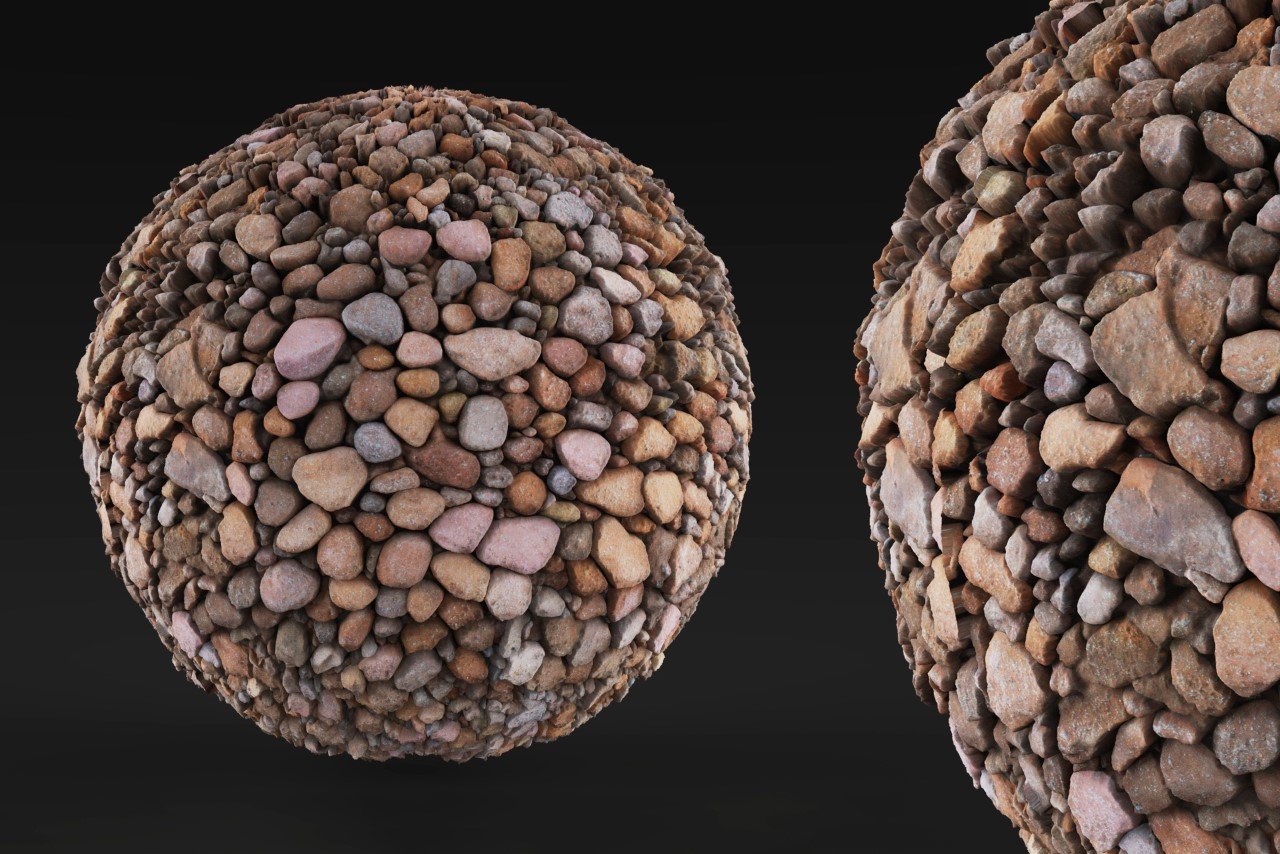
Final render of a sphere with an AI-generated ‘Pebble’ material
A Better, Faster Workflow With KeyShot
In a recent survey conducted by KeyShot, thousands of industrial designers and leaders were asked about their preferred rendering software and the reasons behind their choice. The results revealed that a staggering 88% of respondents believed that KeyShot offers the best 3D rendering quality output compared to other software options. This is due to the fact that other software either requires significant time and expertise to master or simply do not meet the same quality standards as KeyShot.
According to the survey report, KeyShot enables users to maximize their artistry and accuracy by providing a wide range of materials and color libraries, as well as in-depth tools that allow for precise adjustments to even the smallest details. The software also offers instant yet advanced control over various parameters such as lighting, environment, materials, and colors. This is additionally made possible through partnerships with renowned companies like Pantone, which have integrated their libraries into the KeyShot rendering software. Click on the report below to learn more.
Free KeyShot 11 Trial: Download Now | Free KeyShot Report: Download Now
The post How To Create Unique KeyShot Materials Using This Free AI Tool first appeared on Yanko Design.
0 Commentaires