Apple has put a lot of effort into designing the round-shaped AirTag, and it shows in the compactness of size. The tracker manages to fit in the UWB (Ultra-Wide Band connectivity module) version in such a small space that’s barely bigger than the battery fitted inside. Compare that to the Tile Mate or Galaxy SmartTag, and you already know which one is more practical. The small footprint and chip-like thickness of the AirTag make them ideal for real-life usage, and it doesn’t burn a hole in your pocket – as another advantage. Apple AirTag though has one chink in the armor. It doesn’t come with a keyring hole, and that’s frustrating, to say the least. The only way to use it as a cling-on tracker for your keys or other things is to buy an extra peripheral. Or is there a way to get around it?
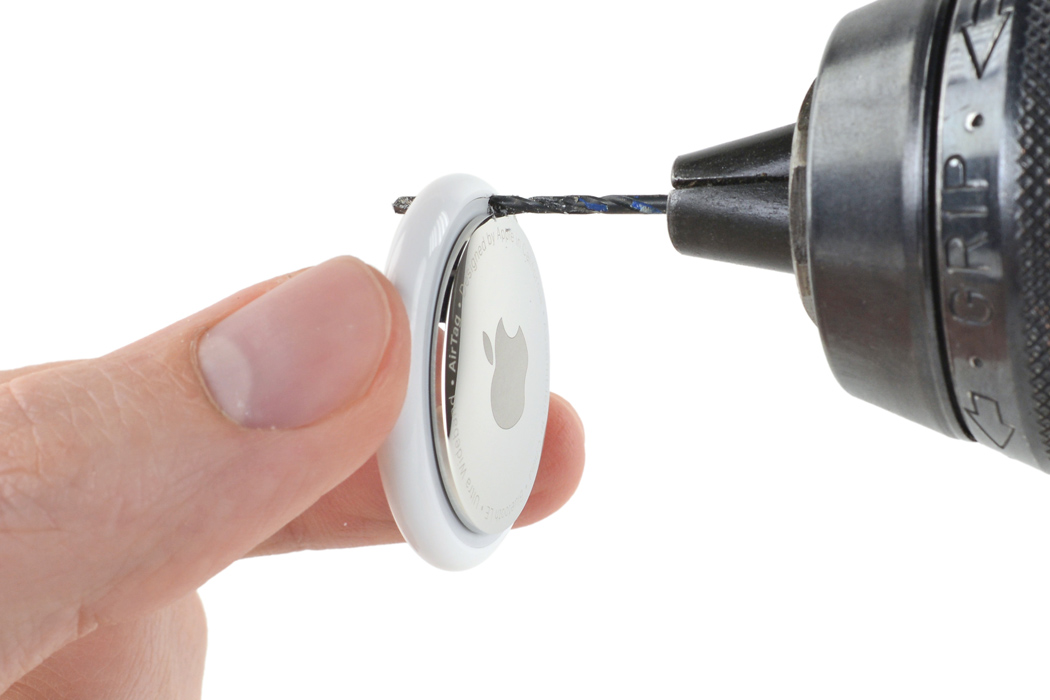
As teardown pros iFixit got down to opening the latest Apple accessory – that’s making all the news – they decided to drill a hole in the AirTag itself. To make it keychain-ready, like the competition, they carefully drilled a punch hole on top of the tracker using a 1/16” drill bit. Surprisingly, the AirTag survived the operation without any functional dystrophy, post the drilling bit. Even the sound profile didn’t change much, so the accessory is as good as out of the box. Yes, it does have a keychain hole now!
iFixit demonstrates how to precisely drill between the notches in the circuit board to avoid puncturing any circuitry and make the tracker non-usable. Removing the battery is another thing that needs to be done without fail before venturing out if you do want to try this DIY to create a loophole in your tag. It should be noted, even if you manage to replicate iFixit’s feat, it will certainly void the accessory’s warranty. Opening up the battery housing isn’t as easy as the other two trackers, and requires some effort and a steady hand. So do keep noted about the facts.
Designer: iFixit
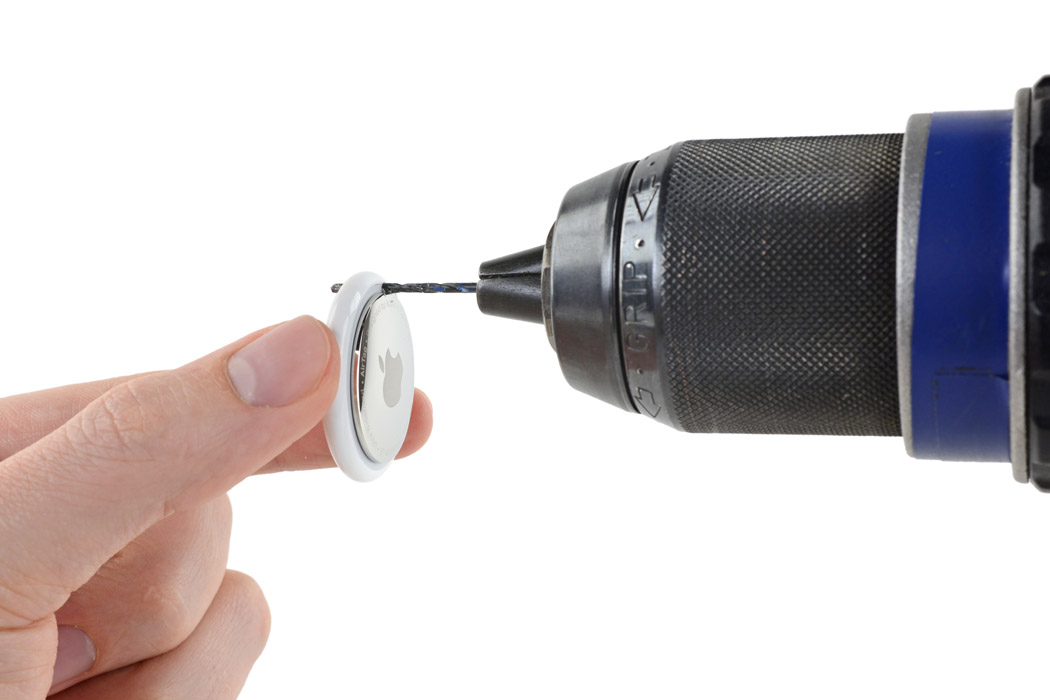
Drilling a hole in the AirTag demands a steady hand, and only venture out if you know what you’re doing. Else, this could turn out into an ugly misadventure.
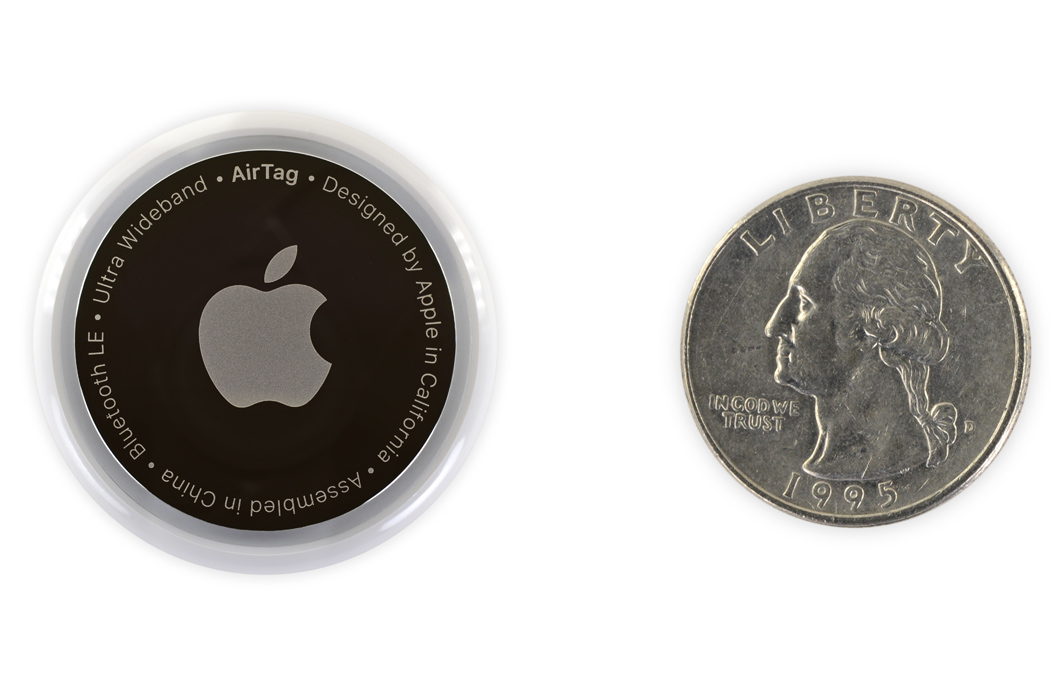
Cute little tracker the size of a half-dollar coin. The only thing that is a deal-breaker is the absence of a keyring hole.

The compact size of the Apple tracker took a considerable amount of R&D to arrive at the final, commercially available form factor. That’s how precise the design process was in refining the final product!
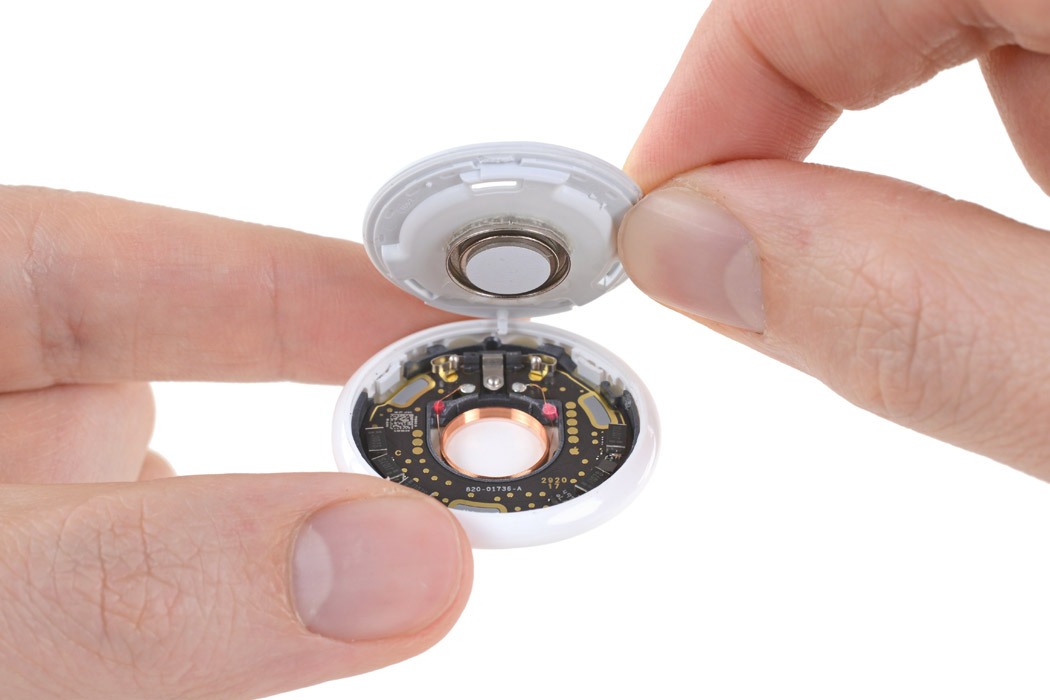
The circuitry and the battery fit snug into place, making perfect use of the small space inside. However, it is not an easy task opening the AirTag as compared to the competition.
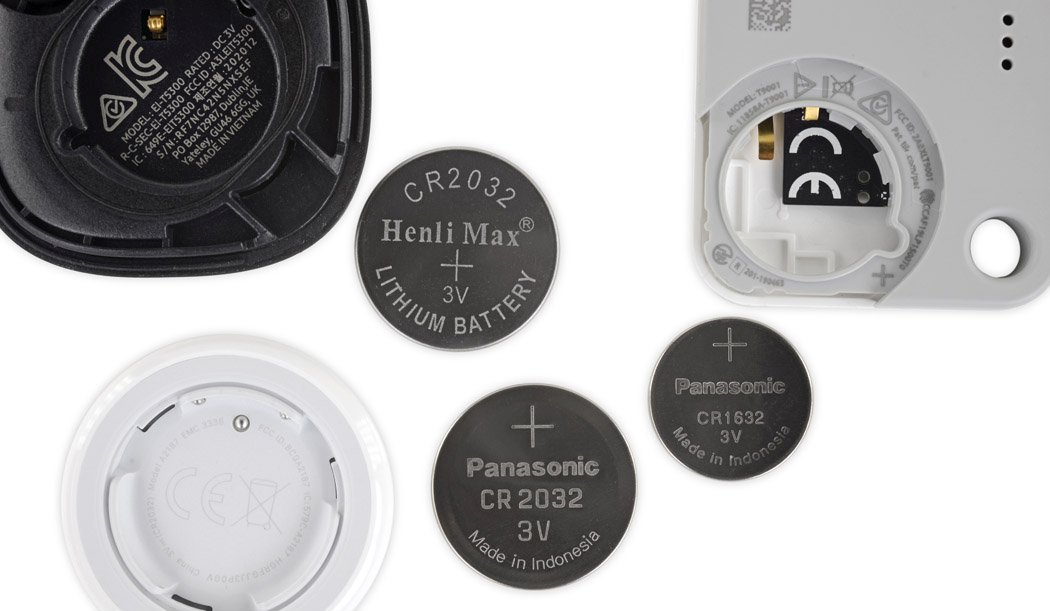
It’s better in looks and functionality for real-life usage due to the small footprint and the round shape. Just imagine the scenarios you can put the tracker to use.
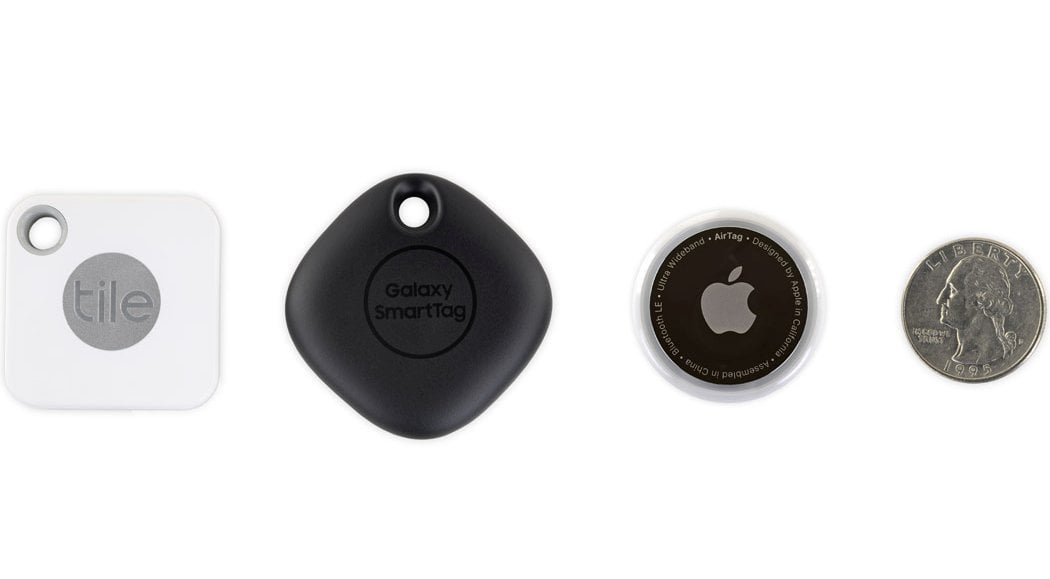
The Tile Mate has a square shape while Galaxy SmartTag goes for a rounded off squarish-shape. While they both are bigger than the AirTag, Apple’s tracker is more aesthetically designed.
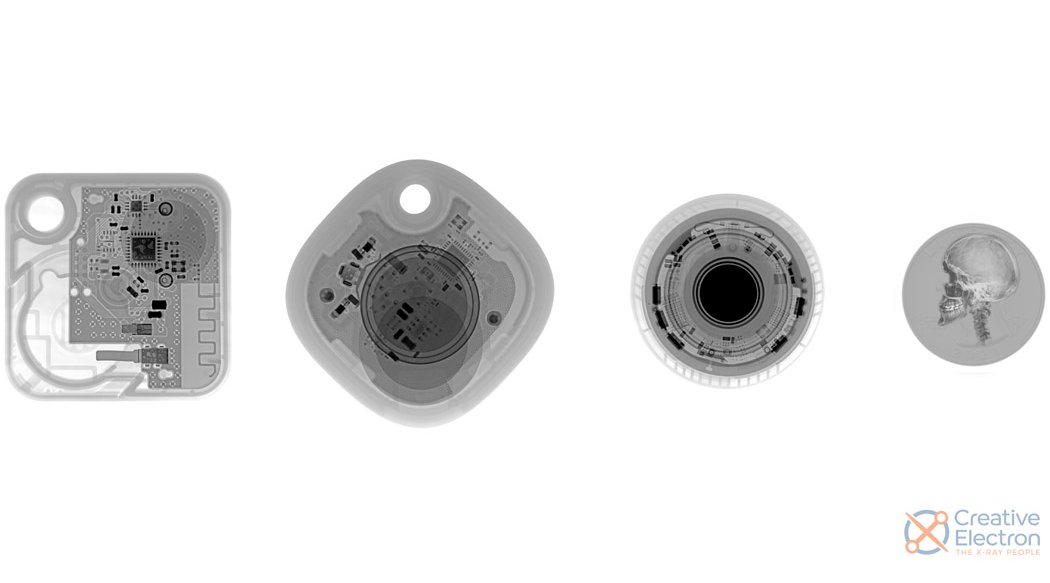
The circuit board and the magnet on the AirTag make it more or less opaque to the X-rays. The image here gives a very good idea of the space you’re left with to drill the hole.
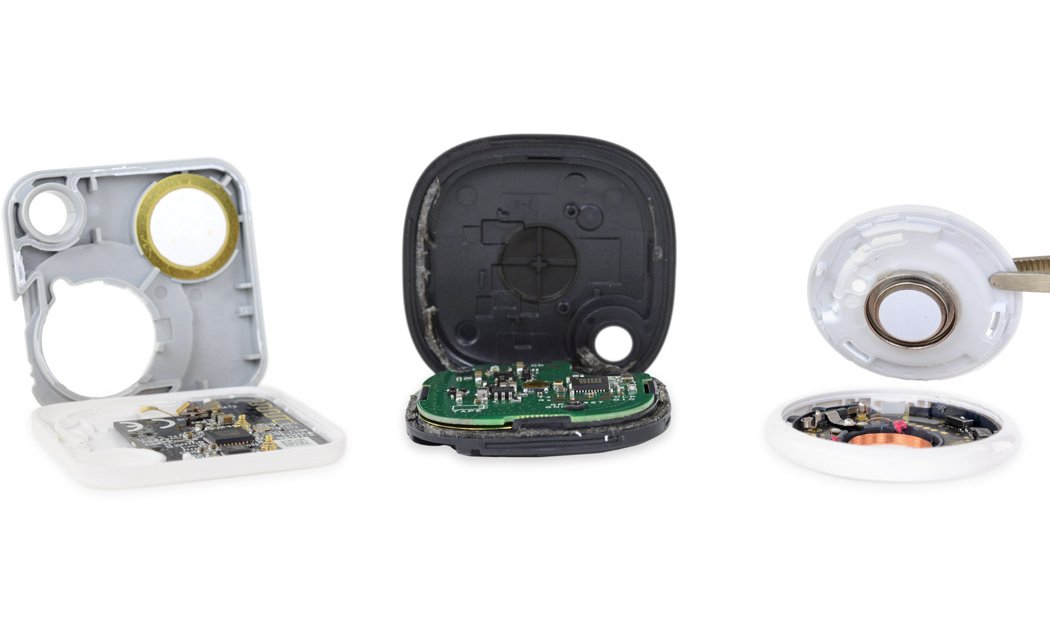
Make no mistake, the AirTag is not as easy to open as the other two trackers in question.

So, are you ready to take the risk, and put your AirTag on the line for the sake of convenience and saving a few dollars?
0 Commentaires